
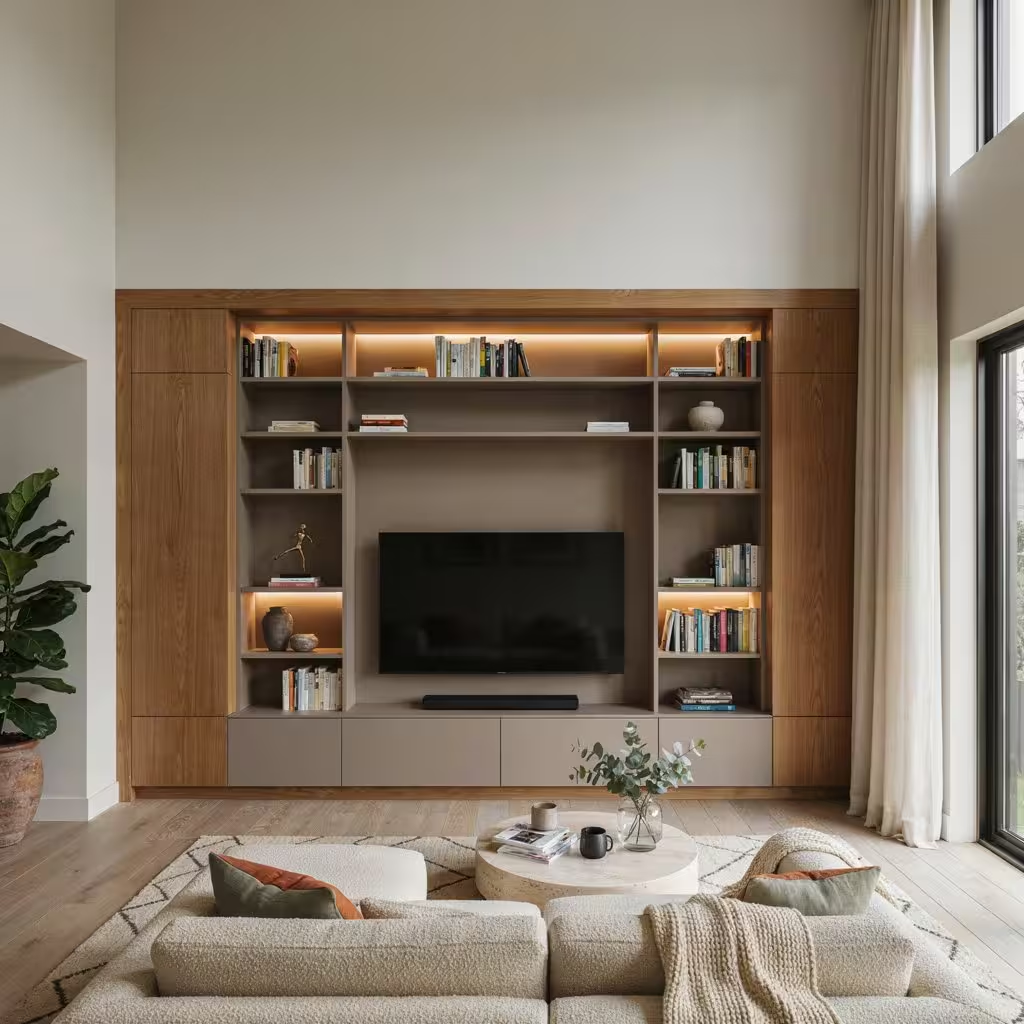
Most living room wall units end up looking like an amateur game of physical Jenga right before the entire structure crashes down. People buy massive wall cabinets, slap them onto thin drywall, and then wonder why their cabinet doors collide with the coffee table or crush family members. Casa Direct brings you raw engineering truth so your living room setup stays anchored, functional, and structurally sound.
Planning Depth and Clearances for Doors, Drawers, and Safe Installation
Standard lower media consoles require a depth of 450mm to 500mm to house deep audio-visual receivers and heavy drawer boxes without overheating or crowding electrical connections.
Upper display shelves must maintain a narrower depth of 300mm to 350mm to prevent head injuries when people rise from nearby seating. Door swing paths demand at least 900mm of open floor space directly in front of the unit. Soft-close cabinet hinges require an extra 20mm of internal space, while rear cable chases consume another 20mm behind structural backboards.
Drawer units with full extension runners require 450mm of clear pull distance to function properly. Leave 50mm of buffer space alongside walls to account for uneven trim and non-plumb plasterboard.
Calculate exact dimensional clearances before buying panels, or suffer smashed toes, blocked walkways, and jammed drawers.
Choosing the Right Layout for Media Storage, Books, and Display Zones
Dividing wall cabinet space requires hard functional zoning rather than random visual aesthetic choices. Dedicate the lower 600mm of your unit exclusively to heavy equipment storage, power distribution, and hidden drawers.
Store books in reinforced central compartments, keeping span lengths strictly under 800mm to prevent structural sagging under heavy weight.
Keep open display zones at direct eye level, between 1200mm and 1600mm from floor level, where internal accent lighting highlights items without creating visual clutter.
Stagger vertical dividers to transfer load weight directly into lower base supports rather than bowing horizontal shelves.
Enclosed cabinet doors conceal messy wires and gaming hardware, while glass panels shield delicate collectibles from dust accumulation.
Grouping items by actual physical weight prevents top-heavy instability across your cabinet setup. Plan rigid spatial zones on paper first, or endure crooked shelves and damaged possessions.
Materials and Finishes How to Select for Daily Use and Cleaning
Low-density particle board ruins wall installations because moisture swells edge joints and screws strip under heavy loads. High-density fiberboard or marine-grade plywood creates the proper core for long-lasting living room joinery.
Lower cabinet bases suffer constant impact from footwear, pets, and vacuum cleaners, making high-pressure laminates or thermofoil the smartest protective surface choice.Matte lacquer provides sleek, modern elegance on upper doors, but standard matte finishes gather oily fingerprints fast unless you specify anti-fingerprint nano coatings.
Real wood veneers bring rich tactile warmth, but require protective polyurethane sealant layers to block moisture damage and wood warp.Glossy acrylic panels offer crisp, reflective aesthetics but require regular maintenance with soft microfibre cloths and pH-neutral liquid cleaners.Harsh chemical sprays, abrasive pads, and acidic liquids strip protective topcoats and ruin delicate edge-banding glue lines.
Modular vs Custom Built Wall Units What to Choose for Your Budget
Modular cabinet systems offer lower upfront pricing and rapid home delivery, but forcing premade boxes into custom wall dimensions leaves ugly gaps, exposed dust traps, and visible ceiling margins.
Custom-built wall units occupy every single millimeter of vertical space, concealing structural wall flaws, uneven floors, and off-angle corners. While custom millwork costs significantly more upfront, factory modular units restrict load capacities and limit custom cable-routing options.
Combining both construction strategies delivers a practical budget compromise. You buy factory-made interior module boxes and attach custom filler panels, custom face frames, and continuous ceiling trim to create a complete built-in look.
Budget calculations must include wall preparation costs, structural anchor hardware, and professional assembly labor.
Cheap modular units fail under real weight, forcing expensive structural repairs that wipe out initial purchase savings.
TV Wall Planning Ventilation, Cable Routing, and Heat Management
Enclosing hot gaming consoles and media amplifiers inside sealed wooden boxes destroys electronics. Modern media bays require dedicated thermal management. Cut lower air-inlet vents and upper exhaust slots into cabinet frames to create continuous natural convection cooling around working hardware.
Install silent 120mm USB exhaust fans inside enclosed compartments that run high-power electronics. Route power cables and data lines through dedicated 60mm wall conduits installed behind hidden rear backboards.
Keep high-voltage AC power lines separated from low-voltage audio/video cables by at least 100mm to eliminate signal interference and screen hum.Mount heavy television brackets into solid wall studs or solid masonry, maintaining a 75mm air gap behind the display panel for proper heat dissipation.Accessible lower compartments must house main surge protectors for simple system power resets.
Lighting Integration: From Ambient Accent LEDs to Task Lighting for Reading
Tacking cheap adhesive light strips to shelf undersides creates harsh glare and exposes light diodes. Mount recessed aluminum channels fitted with frosted diffusers angled at 45 degrees to project smooth light across display items.
Warm 2700K to 3000K LED backlighting installed behind television panels reduces eye fatigue during dark room viewing while highlighting wall textures.
Dedicated reading sections require focused 4000K spotlights producing at least 400 lumens directed over reading seats. Tuck LED drivers, transformers, and wireless dimmers inside upper ventilated cabinet hatches to keep technical maintenance simple.
Hardwire all light channels directly into wall switches rather than cluttering open shelving with loose power cables and unsightly desktop adapters.
Purposeful lighting design transforms plain wooden cabinetry into an architectural focal point while providing the functional light needed for daily room activities.
Hardware and Joinery Details What Affects Strength and Long-Term Alignment
Subpar cabinet hardware causes doors to sag and drawer slides to stick within months of daily use.
Use 3D adjustable concealed hinges rated for heavy door loads to keep panel gaps uniform. Heavy storage drawers require soft-close, full-extension drawer runners rated for at least 45kg.Structural joinery must rely on hardwood dowels, heavy cam locks, or pocket screws bonded with structural wood glue rather than simple finish nails.
Back panels must sit inside routed dado grooves rather than getting stapled onto frame edges, because dadoed backboards deliver crucial diagonal anti-racking strength to the full unit.Internal suspension brackets with two-way adjustment screws enable micro-levelling after filling shelves with real weight.Quality mechanical hardware withstands daily cabinet stress, keeping reveal lines straight and preventing frame warping over years of operation.
Installation Quality Checks: Leveling, Anchoring, and Wall Substrate Requirements
Assuming room walls are plumb or flat guarantees installation failure. Standard drywall lacks the shear strength to support heavy floating wall units on its own.
Fasten load-bearing cabinet rails into solid wall studs using heavy-duty lag screws, or anchor directly into concrete walls using expanding steel anchors.
Hollow wall toggle anchors suit minor accent shelves, but primary cabinet frames demand solid structural timber or masonry backing.
Project precision cross line laser beams across wall surfaces to set true horizontal lines before mounting hanging rails. Insert solid shims behind rear cabinet frames to prevent frame twisting when tightening mounting bolts against uneven plasterboard.
Twisted frames distort door alignments and bind drawer mechanisms. Verify rail weight limits before loading heavy equipment onto upper shelves. Rigorous mounting checks prevent disastrous structural collapses.
Maintenance and Durability Keeping Modern Finishes Looking New Over Time
Regular protective maintenance keeps modern wall units looking factory-new. It extends their structural life: clean matte and high-gloss surfaces using damp microfiber cloths soaked in mild pH-neutral soap solutions.
Avoid ammonia, bleach, or solvent-based glass cleaners, which break down protective topcoats and discolor light lacquers. Check hinge adjustment screws every twelve months to correct minor panel droop before cabinet doors scrape lower frames.Treat natural wood veneers with specialized furniture oils twice yearly to preserve interior moisture balance and prevent surface cracking.
Deploy window blinds to block direct UV sunlight, preventing uneven finish discoloration on timber surfaces.Tighten loose handle screws immediately to prevent loose hardware from gouging protective door finishes during daily use.Systematic care maintains pristine aesthetics and smooth mechanical operation long after installation.
Conclusion
Building a modern wall unit requires exact measurements, solid structural wall anchoring, and smart thermal planning. Never compromise on hardware quality or base substrate support.
Casa Direct USA helps you engineer living room storage that balances visual appeal with real physical strength. Treat your installation like a serious structural project, protect your investments, and build wall units that last forever.